Related Posts

Most mesh coil failures trace back to a single culprit: improper priming. If your device tastes burnt, produces weak vapor, or stops firing altogether, chances are the cotton inside didn’t fully saturate before your first hit, leading to irreversible damage that no amount of troubleshooting can reverse.
Before replacing your coil, check for a simple fix first. Remove your tank, inspect the coil for visible char marks through the mesh ports, and confirm your wattage setting matches the range printed on the coil itself. Running a 0.15-ohm mesh coil at 100 watts when it’s rated for 60-80 watts will burn through cotton in hours rather than weeks.
Beyond user error, mesh coils fail for three primary reasons: manufacturing defects, incompatible e-liquid viscosity (typically high-VG blends that starve the wick), or accumulated residue from sweetened juice. This guide walks you through systematic diagnosis of each symptom, from muted flavor to complete coil death, with step-by-step fixes you can attempt before buying replacements. You’ll learn to identify whether your problem stems from wicking issues, power settings, or genuine hardware failure.
Safety matters here. If your device shows error messages, gets unusually hot, or produces a chemical smell beyond typical burnt cotton, stop using it immediately. These signs point to electrical problems or battery issues that require professional assessment, not DIY repairs. The rise of mesh coil trends in 2026 has brought higher-performance devices, but that performance demands more attention to setup and maintenance than older coil designs ever did.
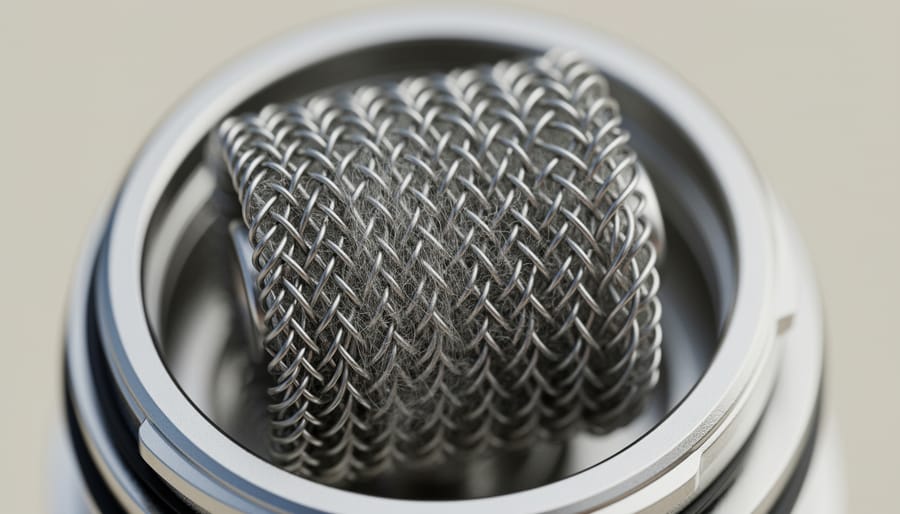
Mesh coils represent a significant evolution from traditional wire coil designs. Instead of using a single wrapped wire, mesh coils feature a flat strip of fine metal mesh, typically kanthal, stainless steel, or nichrome, formed into a grid pattern with hundreds of tiny holes. This fundamental design difference creates a dramatically larger heating surface that contacts more cotton and e-liquid simultaneously.
The advantages of this expanded surface area are substantial. Mesh coils heat e-liquid more evenly across their entire width, eliminating hot spots that plague conventional coils. This uniform heating produces richer, more consistent flavor since the e-liquid vaporizes at the same temperature throughout the mesh strip. Users also experience faster ramp-up times and denser vapor production. The mesh design wicks e-liquid more efficiently through multiple contact points, reducing the likelihood of dry hits under normal conditions. These benefits have made mesh coils the dominant choice in modern vaping devices, as reflected in current vaping facts 2026.
However, this same design that creates superior performance also introduces specific vulnerabilities. The thin mesh material degrades faster than thicker wire when exposed to sweetened e-liquids or improper power settings. The larger wicking ports demand more efficient e-liquid flow, making mesh coils less forgiving of high-VG formulations or inadequate priming. Understanding these trade-offs is essential for effective troubleshooting.
Identifying the exact problem with your mesh coil is the first step to fixing it. Different symptoms point to different underlying causes, so paying attention to what your device is doing, or not doing, will save you time and frustration.
Start by observing the most obvious signs. If you’re getting a harsh, acrid taste that makes you cough, that’s a burnt hit, usually caused by a dry or damaged coil. Conversely, if the vapor tastes fine but seems thin or flavorless compared to when the coil was new, you’re dealing with muted flavor or weak production. Leaking shows up as e-liquid seeping from the airflow, tank seams, or mouthpiece, often leaving your device sticky or your pocket damp. No vapor at all means either the device won’t fire when you press the button, or it fires but produces nothing visible. Gurgling or bubbling sounds during use typically indicate flooding inside the coil chamber. Weak hits feel like you’re drawing harder than usual but getting less vapor than normal, even though the device appears to be working.
| Symptom | Likely Cause | Quick Fix Reference |
|---|---|---|
| Burnt, harsh taste | Dry or damaged coil | Priming, wattage adjustment |
| Muted flavor, weak vapor | Gunked coil or low power | Coil replacement, power check |
| Leaking e-liquid | Bad seals or overfilling | Seal inspection, proper filling |
| No vapor production | Connection issue or dead coil | Clean contacts, reseat coil |
| Gurgling sounds | Flooded coil chamber | Clear excess liquid, adjust fill |
Once you’ve pinpointed which symptom matches your experience, you can move directly to the relevant cause and solution. Most mesh coil problems fall into predictable patterns, and accurate diagnosis is half the battle. Don’t try to fix everything at once, address the specific symptom you’re experiencing first, then reassess if needed.
Burnt or dry hits from a mesh coil typically stem from inadequate e-liquid saturation reaching the mesh during firing. When you inhale and taste that harsh, acrid flavor, the mesh is heating without sufficient liquid to vaporize, essentially scorching the cotton wicking material instead.
Insufficient wicking occurs when the cotton cannot draw e-liquid to the mesh fast enough to replace what’s being vaporized. This often happens with thick, high-VG e-liquids (70% VG or higher) that flow slowly through the wicking ports. The viscous liquid simply can’t saturate the cotton quickly enough between puffs.
Improper priming is another common culprit. If you don’t manually saturate the cotton with e-liquid before first use, or don’t let a freshly installed coil sit for at least five minutes, the wicking material starts out too dry. The first few hits then burn the cotton rather than vaporize liquid.
Chain vaping compounds the problem by not allowing recovery time. Firing repeatedly without 15-30 second pauses depletes the liquid in the cotton faster than it can re-saturate. Each successive hit gets drier until you taste burnt cotton.
Incorrect wattage settings accelerate liquid consumption beyond the wicking’s capability. Running a coil rated for 60-80W at 85W forces it to vaporize liquid faster than the cotton can supply. Even properly primed coils will give dry hits when overpowered. Always start at the lower end of your coil’s recommended wattage range and increase gradually.
Weak vapor clouds or diminished flavor often signal a mesh coil that’s nearing the end of its usable life or operating under suboptimal conditions. As coils age, the mesh material accumulates residue from e-liquid, particularly from sweeteners and artificial flavorings. This buildup, commonly called “gunk”, coats the heating surface, insulating it from direct contact with your e-liquid and severely dampening both vapor production and flavor intensity.
Battery performance directly affects output. A partially drained battery can’t deliver the power needed to heat the mesh properly, resulting in cooler vapor and weaker hits. Similarly, if your device is set below the coil’s recommended wattage range, the mesh won’t reach optimal temperature for vaporization.
Check your airflow slots and vents. Lint, pocket debris, or condensation can partially block these openings, restricting the air moving across your coil. Reduced airflow means less vapor and a concentrated, sometimes harsher taste.
Coil degradation itself is inevitable. Mesh coils typically last one to three weeks depending on usage and e-liquid composition. Once the mesh begins breaking down internally, developing microscopic hotspots or thinning, performance drops noticeably even when everything else is properly configured.
Leaking happens when e-liquid escapes the tank through seals or air holes, while flooding occurs when too much liquid saturates the coil and chamber. Both issues waste e-liquid, create mess, and compromise performance.
Overfilling is the most common culprit. Tanks have a maximum fill line for a reason, exceeding it puts pressure on seals and forces liquid through air channels. Always leave air space at the top to accommodate pressure changes.
Damaged or misaligned O-rings break the tank’s seal. These small rubber gaskets degrade over time, crack from heat, or shift during reassembly. Inspect them regularly for tears, flattening, or visible wear. Even a slightly twisted O-ring can create a leak path.
Improper coil installation leaves gaps where liquid can seep through. If the coil isn’t threaded completely or sits crooked in the base, it won’t seal properly against the tank. Cross-threading during installation is a frequent mistake that prevents a tight fit.
Temperature fluctuations cause e-liquid to expand and contract. Moving from cold to warm environments (like bringing your vape indoors from a car) changes internal pressure, pushing liquid through airways or weakening seals temporarily.
Thin, low-VG e-liquids flow more easily through small gaps and wick faster than the coil can vaporize them, leading to flooding. Mesh coils typically handle 60/40 or 70/30 VG/PG ratios best.
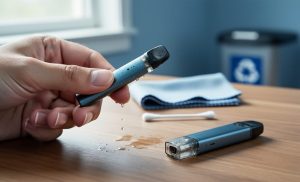
When absolutely nothing happens, no vapor, no light, no response, your mesh coil vape has either lost electrical continuity or triggered a safety lockout. Connection problems are often the culprit. A loose coil creates incomplete circuit contact between the 510 pin and the device’s firing mechanism. Unscrew your tank, check that the coil sits firmly in the base threads, then reconnect everything snugly. Dirty or corroded contacts also break the circuit. Residue from e-liquid, pocket lint or oxidation builds up on the center pin and threading. Wipe both the device connection and tank base with a dry cloth or cotton swab dipped in isopropyl alcohol.
A completely dead coil, one with internal wire breakage, produces identical symptoms to a device won’t fire scenario. If cleaning and reseating don’t help, swap in a fresh coil to rule this out. Modern devices include short-circuit protection, atomizer-check sensors and low-resistance cutoffs that halt firing when readings fall outside safe parameters. An incorrectly installed coil or one with damaged mesh can trip these features. Finally, verify your battery holds sufficient charge; some mods won’t fire below specific voltage thresholds even if the indicator shows partial life remaining.
Burnt hits from a mesh coil usually signal inadequate saturation or excessive heat. The fix depends on whether you’ve just installed the coil or have been using it for a while.
Start by priming a new coil properly. This one-time process prevents dry hits from the outset:
For existing coils producing burnt tastes, first verify your wattage setting. Mesh coils heat rapidly and often perform best at lower wattages than you’d expect. If you’re at the upper limit of the recommended range, drop down by five watts and test.
Chain vaping doesn’t allow the cotton enough time to rewick between puffs. Space your hits by at least 15 to 20 seconds, particularly with high-VG liquids that flow more slowly. If burnt hits persist despite proper pacing and wattage, consider switching to a 70/30 or 60/40 VG/PG blend, which wicks faster through mesh coils.
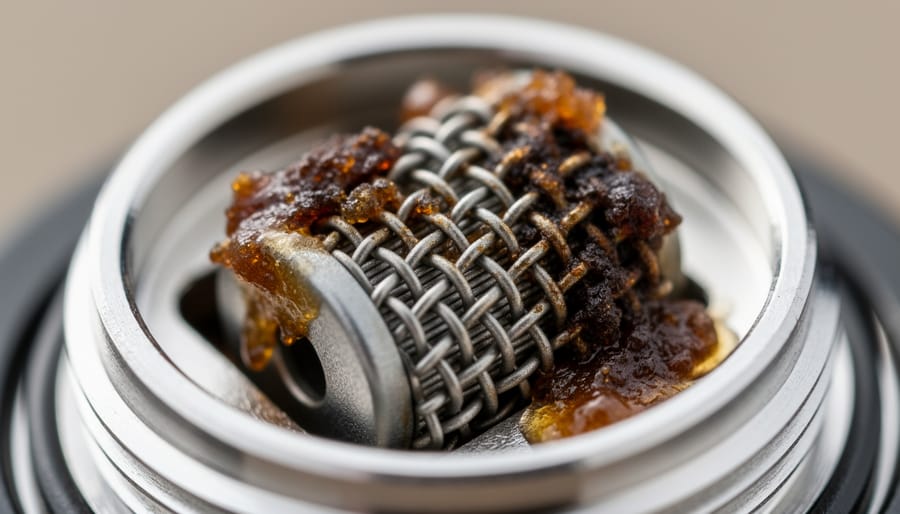
When your mesh coil delivers weak vapor or muted flavor, start with the quickest fixes before replacing the coil. First, increase your wattage by 5W increments within the coil’s rated range, underpowering is a common culprit. Check your battery level; devices below 40% charge can’t deliver consistent power, especially at higher wattages.
Inspect your airflow vents for e-liquid residue or pocket lint. Close the airflow completely, then wipe the slots with a dry cloth or cotton swab. Restricted airflow chokes vapor production and concentrates heat unevenly.
If flavor remains flat, your coil likely has caramelized sweetener buildup. Remove the coil while still warm and rinse it under hot water for 30 seconds, gently agitating the mesh. Let it air-dry completely overnight before reinstalling and re-priming. This extends life temporarily but won’t restore factory performance.
For persistent issues, replace the coil. Even properly maintained mesh degrades after 7-14 days of regular use as the metal oxidizes and residue becomes permanent. A fresh coil with proper priming typically resolves flavor and vapor problems immediately, confirming the old coil was simply exhausted.
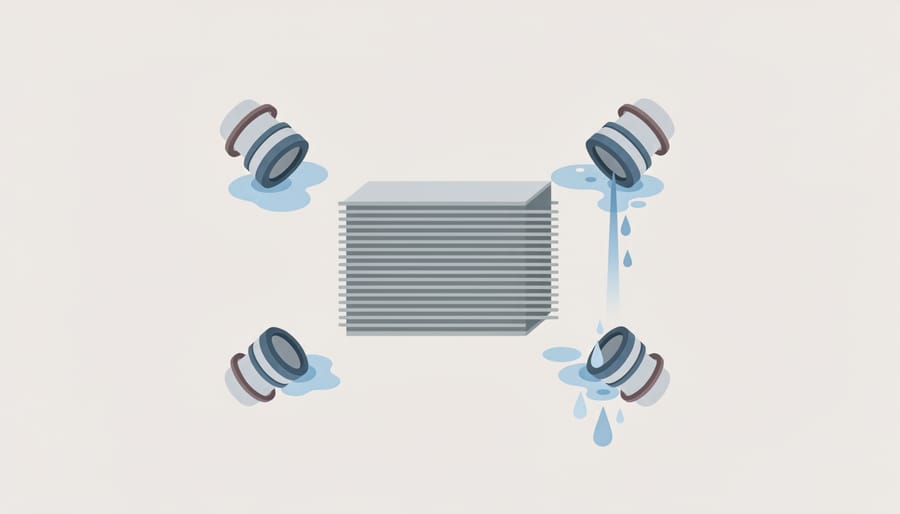
Most leaks stem from fixable assembly mistakes rather than defective hardware. Start by completely disassembling your tank and wiping all components dry with a lint-free cloth. Inspect every O-ring for cracks, deformation, or debris, even a tiny hair caught under a seal can break the vacuum. Replace damaged O-rings immediately; most manufacturers include spares with new coils.
When reinstalling the coil, thread it in carefully by hand until it seats snugly, then give it just a quarter-turn past finger-tight with your tank base.
Before filling, hold the tank up to light and verify the coil sits flush with no visible gaps around the threads.
Fill to just below the maximum line, overfilling pressurizes the tank and forces e-liquid through the coil’s wicking ports. After filling, screw the top cap on evenly (listen for both threads catching simultaneously), invert the tank once, and let it stand upright for two minutes to equalize pressure. If leaking continues after reassembly, the issue likely traces to a worn coil gasket or damaged chimney seal rather than user error, meaning coil replacement becomes necessary.
When your device refuses to fire or the firing button does nothing, start with the simplest fix: unscrew the tank and check the 510 connection pin on both the device and coil base. Gently clean these contact points with a cotton swab or tissue to remove any e-liquid residue or debris that might block the electrical connection.
Remove the coil completely and reinstall it, ensuring it’s hand-tight but not over-tightened. A loose coil won’t make proper contact, while excessive force can damage the threading or compress the pin too far. After reseating, try firing again.
If the device still won’t produce vapor, check your battery level. Many modern devices won’t fire below certain voltage thresholds, displaying error messages like “Low Battery” or “Check Atomizer.”
Some devices have built-in safety features that prevent firing when they detect issues like short circuits or atomizer resistance outside acceptable ranges. Consult your device manual to understand specific error codes, as these can indicate whether the problem is the coil, battery, or device settings.
Getting a mesh coil set up correctly from the start prevents the majority of problems users encounter later. While research on vaping technology continues to advance device performance, proper installation remains the foundation of a reliable vaping experience.
Start by inspecting the new coil for any visible defects, damaged mesh, loose seals, or manufacturing flaws. Remove the coil from its packaging and check that the O-rings sit flush and undamaged. Before installation, identify your device’s recommended wattage range, typically printed on the coil itself or in the manufacturer’s documentation.
When installing, thread the coil into the tank base gently but firmly, ensuring a complete seal without overtightening. Cross-threading damages both the coil and tank, so stop immediately if you feel resistance and realign. Once seated, fill your tank about two-thirds full to prevent both dry hits and overfilling issues.
The priming process deserves particular attention with mesh coils. Apply three to five drops of e-liquid directly onto the exposed cotton wicking ports and mesh surface. This initial saturation protects the mesh during those critical first fires. After reassembling and filling the tank, wait five to ten minutes before vaping, patience here pays dividends in coil longevity.
Set your device to the lower end of the recommended wattage range for the first tank. Take several primer puffs without pressing the fire button to draw e-liquid into the mesh. When you begin vaping, keep sessions short and gradually increase wattage over the next few tanks until you reach your preferred setting. This break-in period allows the cotton to fully saturate and the mesh to season properly, establishing the foundation for consistent performance.
Getting the most life from your mesh coil comes down to a few preventive habits that reduce stress on the heating element and wicking material. With mindful usage and basic upkeep, you can often double the typical coil lifespan while maintaining consistent performance.
Choose Your E-Liquid Wisely
E-liquid composition directly affects coil longevity. High-VG formulas (above 70% VG) are thicker and wick more slowly into mesh, which can lead to dry spots and premature burning, especially at higher wattages. If you prefer VG-heavy liquids, use moderate power settings and give the cotton extra time to saturate between hits. Heavily sweetened e-liquids containing sucralose caramelize on the mesh surface, creating a sticky residue that clogs the heating element and mutes flavor within days. Opting for unsweetened or lightly sweetened options can extend coil life by a week or more.
Manage Power Settings Conservatively
Running mesh coils at the upper limit of their wattage range generates more vapor but accelerates degradation. Starting at the lower end of the recommended wattage and increasing gradually lets you find the sweet spot for flavor without unnecessarily stressing the coil. Consistent power output also matters, a fully charged battery delivers more stable performance than one running low, which can cause uneven heating.
Practice Smart Vaping Habits
Chain vaping doesn’t give the wicking material enough time to resaturate, leading to dry hits that char the cotton and damage the mesh. A 15-30 second pause between draws allows e-liquid to replenish the coil. Keep your tank at least one-quarter full, as low liquid levels reduce wicking efficiency and expose parts of the mesh to air.
Regular Tank Maintenance
Residue accumulates in the tank over time, affecting both flavor and coil function. Rinse your tank with warm water every few days and let it air dry completely before reassembling. When installing a fresh coil, wipe down the tank interior and contact points to ensure a clean environment. This simple step prevents old e-liquid buildup from contaminating new coils.
Even with proper troubleshooting, mesh coils eventually reach the end of their usable life. Knowing when to stop fixing and start replacing saves you from wasting time on a coil that’s beyond recovery, and helps you avoid potential safety issues from continuing to use degraded components.
Most mesh coils last between one and three weeks depending on usage intensity, e-liquid sweetener content, and power settings. Heavy users who vape high-wattage setups with sweetened e-liquids might replace coils weekly, while moderate users with cleaner liquids can stretch coils closer to a month. Track your usage patterns to establish realistic expectations for your specific setup.
Several clear signs indicate your mesh coil needs immediate replacement rather than additional troubleshooting:
Never continue using a coil that produces a metallic taste, makes unusual crackling sounds different from normal vaporization, or shows any physical deformity. These symptoms indicate structural failure that could release metal particles or cause device malfunction. While vaping laws regulate product safety standards, personal vigilance about component condition remains your responsibility.
When performance declines gradually rather than suddenly, replacement typically offers better results than extended troubleshooting. A fresh coil costs a few dollars and eliminates uncertainty, a worthwhile investment compared to hours spent trying to revive a worn-out component.
A properly maintained mesh coil typically lasts 1-3 weeks depending on usage frequency, e-liquid type, and power settings. Heavy users or those vaping high-sweetener e-liquids may need replacements more frequently, while moderate users with cleaner e-liquids can extend coil life toward the upper end of this range.
While you can rinse mesh coils with warm water to remove some buildup and potentially extend their life by a few days, they cannot be truly restored to original performance. The mesh design makes thorough cleaning difficult, and residual caramelization remains embedded in the metal, so replacement is ultimately necessary.
E-liquids with high sweetener content leave residue that caramelizes on the mesh, creating a layer that blocks proper wicking and causes premature burning. High-VG liquids also wick more slowly through mesh coils, which can lead to dry spots if you’re chain vaping or using high wattages.
Always start at the lower end of your coil’s recommended wattage range (printed on the coil itself) and increase gradually until you find your preferred balance of flavor and vapor production. Most mesh coils perform best in the middle of their range rather than at maximum power, which helps prevent burning and extends coil life.
These questions reflect the most common concerns users have when troubleshooting mesh coil problems. If you’re experiencing persistent issues even after following the troubleshooting steps outlined earlier, check your device’s manual for compatibility specifications. Some older devices lack the power output or chipset features needed to run modern mesh coils efficiently, which can create problems that no amount of technique adjustment will fix.
Pay attention to the specific resistance rating of your mesh coil and ensure your device supports it. Sub-ohm mesh coils (below 1.0Ω) require sufficient battery power and appropriate safety features, while higher-resistance mesh coils work with a wider range of devices but may deliver less vapor production. Matching your coil specifications to your device capabilities prevents many frustrating performance issues before they start.
Most mesh coil problems stem from preventable issues rather than fundamental design flaws. When your device isn’t performing as expected, systematic troubleshooting based on observable symptoms consistently yields better results than random trial and error. The majority of burnt hits, weak vapor, and leaking can be traced back to improper priming, incorrect wattage settings, or basic maintenance oversights.
Understanding the relationship between your specific mesh coil, e-liquid choice, and device settings forms the foundation of trouble-free vaping. A coil rated for 60-80W won’t function properly at 40W, just as high-VG liquids will struggle to wick efficiently in coils designed for balanced ratios. These aren’t mysterious malfunctions; they’re mismatches between components and usage patterns.
Prevention remains more effective than repair. Taking three minutes to properly prime a new coil eliminates the primary cause of premature failure. Regular inspection of O-rings costs nothing but prevents frustrating leaks. Matching your wattage to manufacturer specifications avoids both burnt wicks and weak performance.
When troubleshooting becomes necessary, start with the simplest explanation. Check your battery charge before assuming your coil has failed. Verify your tank is assembled correctly before ordering replacement parts. Clean connection points before concluding your device is broken.
The troubleshooting framework outlined here addresses the actual causes of mesh coil problems rather than symptoms alone. Apply these evidence-based solutions methodically, and you’ll resolve most issues without guesswork or unnecessary replacements.