Related Posts

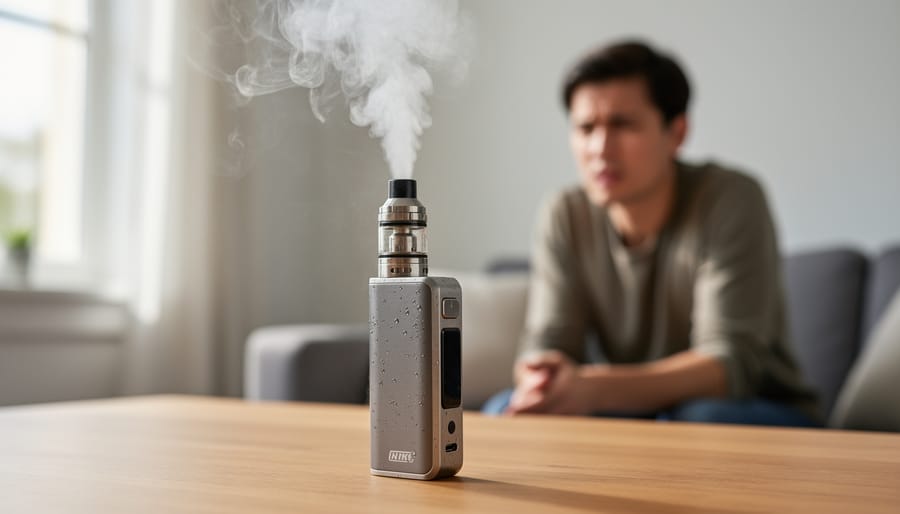
If your vape continues firing for a second or two after you release the button, a stuck or debris-clogged fire button is the most common culprit. Remove the tank or pod immediately, inspect the button area for e-liquid seepage or particulate matter, and clean around the button housing with a dry cotton swab. If the device fires continuously without stopping, remove the battery or pod right away to prevent overheating and potential thermal runaway.
The quickest diagnostic: press the fire button several times without the tank attached. If it sticks, feels mushy, or the device fires on its own, you’ve confirmed a button mechanism issue. If the button feels normal but auto-firing persists when you reconnect the tank, the problem likely involves a short circuit in the atomizer connection or a faulty coil.
Auto-firing represents an active safety hazard. The device is delivering power when it shouldn’t, which can overheat the coil, damage the battery, or in rare cases cause venting or fire. Some modern regulated devices include auto-shutoff protection that cuts power after 10 seconds of continuous firing, but older or unregulated mods may lack this safeguard entirely. Never leave an auto-firing device unattended, and don’t attempt to charge it until the issue is resolved.
This guide walks through the most frequent causes of post-hit auto-firing, from simple e-liquid contamination to failing chipset sensors, then provides step-by-step troubleshooting to isolate and fix the problem. You’ll also learn when a device has reached the end of its safe service life and should be retired rather than repaired.
Auto-firing creates unmistakable symptoms that differ from normal device operation. The most obvious sign is continued vapor production after you’ve released the fire button or stopped inhaling on a draw-activated device. You’ll see vapor streaming from the mouthpiece even though you’re no longer using the device.
Physical sensations accompany visual cues. The device becomes noticeably warm or hot in your hand, particularly around the battery compartment and atomizer connection. This heat builds quickly during an auto-fire event as the coil continues heating without interruption. Some users report feeling vibration from the firing mechanism that should have stopped.
Audible indicators help confirm the problem. Many modern devices produce a soft clicking or humming sound when the coil activates. If you hear this sound continuing after your hit ends, the device is still firing. Button-activated devices may show the LED indicator light remaining on instead of turning off when you release the button.
Draw-activated devices present a specific variant where the sensor fails to register that inhalation has stopped. The airflow sensor continues signaling the chipset to fire, producing vapor for several seconds after you finish your draw. This delay distinguishes true auto-firing from the normal second or two of residual vapor that can appear from coil heat dissipation.
Not every unexpected behavior indicates auto-firing. Brief LED flashes after use, slight warmth from recent firing, and small wisps of vapor from cooling coils represent normal operation rather than malfunction.
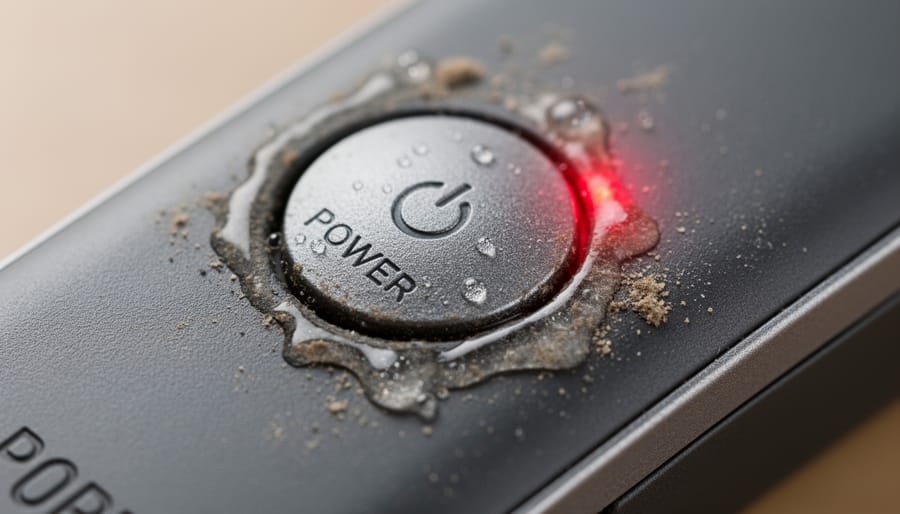
The activation button is one of the most common culprits when a vape continues firing after you release it. Over time, e-liquid can seep into the button housing through microscopic gaps, creating a sticky film that prevents the button from fully returning to its resting position. This residue acts like glue, keeping internal contacts engaged even after you’ve stopped pressing. Similar issues occur with pocket lint, dried condensation, or sugary e-liquid deposits that accumulate around the button edges.
Physical damage compounds the problem. A dropped device can crack the button housing, bend internal springs, or misalign the mechanism so it no longer clicks cleanly. Even minor impacts can create enough structural damage that the button sticks intermittently, which explains why auto-firing sometimes happens after certain hits but not others. If you’re experiencing broader device issues alongside button problems, basic mesh coil troubleshooting principles apply: inspect for visible damage, check connections, and clean thoroughly before assuming the worst.
E-liquid and debris inside your device create conductive pathways that bypass normal firing controls. When e-liquid leaks from the tank or pod, it seeps into gaps around buttons, air sensors, and circuit board contacts. This liquid contains vegetable glycerin, propylene glycol, and other conductive substances that can bridge electrical connections, making your device think the button is pressed even when it isn’t.
Condensation builds naturally inside devices during temperature changes, pulling a warm vape from your pocket into cold air creates moisture that settles on internal components. Combined with pocket lint, dust, or fabric fibers that work their way through air intake vents, this contamination accumulates on contact points and sensor mechanisms.
The firing button assembly is particularly vulnerable. E-liquid wicks along the button shaft through microscopic gaps, depositing sticky residue on the contact switch inside. This residue holds the contacts closed momentarily after you release the button, causing continued firing until surface tension breaks or the liquid evaporates.
Auto-draw devices face similar issues when debris blocks or distorts airflow sensors, creating false-positive activation signals from normal air movement inside the device.
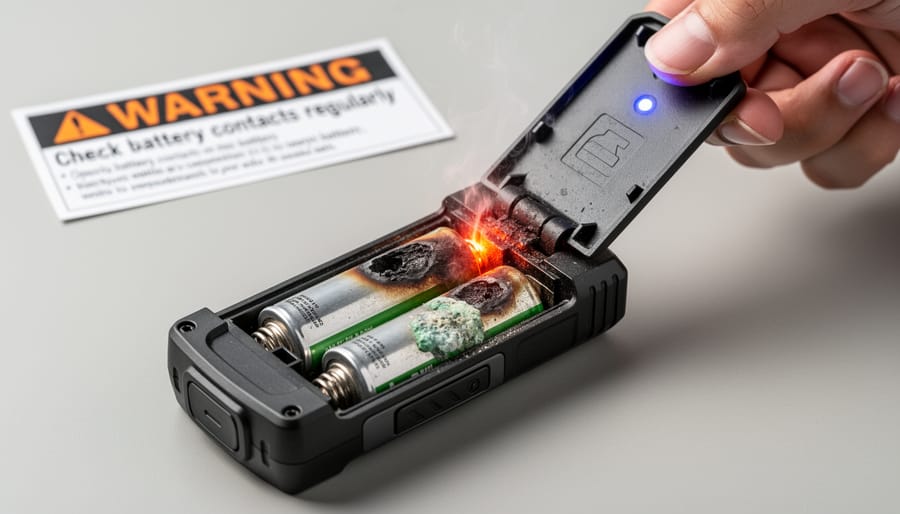
Battery connections serve as the critical pathway between your power source and the device’s activation system. When these connections degrade or become unstable, they can send erratic signals that keep the firing circuit engaged even after you’ve finished your draw.
Loose battery terminals create intermittent contact that confuses the device’s control board. As batteries shift slightly during normal use, worn threading or damaged connection pins may maintain electrical contact in unintended ways, essentially creating a “ghost button press” that continues the firing cycle. The threaded battery cap or magnetic connection that should firmly secure the battery can loosen over time through repeated insertion and removal, allowing the battery to rattle or shift position. This movement changes the contact pressure on the firing pins, and in some cases, the battery settles into a position that completes the firing circuit permanently.
Physical damage to the contact points themselves compounds the problem. Bent pins, corroded metal surfaces, or compressed spring-loaded contacts may no longer make clean, controlled connections. Instead, they create partial circuits or allow current to flow through paths that bypass the activation button entirely, leaving your device in a perpetual firing state.
Electronic chipset failure represents the most serious and least repairable cause of post-hit auto-firing. Modern vape devices rely on microcontrollers to manage power delivery, safety cutoffs, and firing duration. When these control boards malfunction, whether through manufacturing defects, moisture damage, or component degradation, they can lose the ability to recognize when you’ve released the fire button or completed a draw.
The result is a device that continues powering the atomizer indefinitely because the chipset can no longer process the “stop firing” signal. Unlike mechanical issues with buttons or contacts, chipset failures occur at the software and circuit level, making them impossible to fix through cleaning or adjustments.
Common signs include erratic behavior before complete failure (random power fluctuations, display glitches, inconsistent firing), devices that fire after software updates, or units that show no physical damage but won’t stop firing. Once a chipset fails in this way, the device becomes unsafe and must be replaced immediately, no amount of troubleshooting will restore proper function to failed electronic components.
If your vape continues firing after you release the button, act immediately. First, power off the device using its fire button (typically five rapid clicks) or power switch if accessible. If the device won’t shut off or lacks these controls, remove the pod, cartridge, or tank straight away to break the circuit. For devices with removable batteries, eject the battery cell. Place the device on a non-flammable surface and let it cool for at least ten minutes, continued firing generates heat that can damage internal components or pose burn risks. Once cool, inspect for visible damage: check for melted plastic around the button, warped battery casing, or burnt smells. Don’t attempt to use the device again until you’ve identified and resolved the cause.
Residue buildup inside and around the firing button is a frequent culprit behind post-hit auto-firing. Even thin layers of e-liquid or sticky residue can prevent the button from fully releasing after you press it.
Start by powering off your device completely. Dip a cotton swab in 91% or higher isopropyl alcohol, don’t oversaturate it, just dampen it. Gently clean around the edges of the firing button, working the swab in small circular motions to lift residue from the seams. Press the button several times while cleaning to work the alcohol into the mechanism.
Next, address the threading and battery connection points. Use a fresh alcohol-dampened swab to clean the threaded sections where your tank or pod connects, plus the metal contact pin or plate at the center. These areas collect condensation and leaked e-liquid that can create false firing signals.
Let everything air-dry for at least fifteen minutes before reassembling. Alcohol evaporates quickly, but trapped moisture in tight spaces needs time to dissipate. Rushing this step risks pushing liquid deeper into the device when you reconnect components.
Poor battery contact is a common trigger for auto-firing after a hit. Disconnect your battery or pod, then examine all connection points under good lighting. Look for green or white corrosion buildup, dark spots from arcing, or worn plating on the battery terminals. Check the device’s center pin, if it’s pushed down or bent to one side, it won’t maintain consistent contact.
To clean the connections, dampen a cotton swab with 99% isopropyl alcohol and gently scrub the battery terminals and the device’s contact plates in circular motions. For stubborn corrosion, let the alcohol sit for 30 seconds before wiping. Dry everything thoroughly with a clean swab or lint-free cloth. If your device has a spring-loaded pin, press it a few times to work alcohol into the mechanism, then dry completely.
Before reassembling, inspect for physical damage. Cracked insulator rings, deeply pitted metal, or pins that won’t spring back indicate the connection has failed beyond cleaning and the device needs replacement.
Once you’ve cleaned the button and contacts, test the mechanism before reconnecting any power source. Press the fire button several times without a battery or pod installed. The button should click distinctly and spring back immediately after each press. There should be no sticking, grinding, or resistance when you release it.
Pay attention to how the button feels compared to when the device was new. Any mushiness, delayed return, or partial sticking means the button assembly still has contamination or damage. If it doesn’t return crisply every time, repeat the cleaning process with fresh isopropyl alcohol, focusing on the button’s internal cavity and spring mechanism.
After confirming smooth operation through multiple test presses, let the device sit for several minutes to ensure the button doesn’t drift into a pressed position on its own. Only when it consistently returns and stays in the unpressed position should you proceed to reconnect the battery or pod for powered testing.
If you’ve cleaned the button, battery contacts, and device thoroughly but the auto-firing continues, replacement is the only safe option. Visible physical damage, cracked housings, melted plastic around the button, burnt smell, or discolored battery wraps, means internal components are compromised beyond repair. A button that still sticks after cleaning or feels mushy and unresponsive indicates mechanical failure that cannot be fixed at home. Devices that fire immediately upon battery insertion, even with the button untouched, have electrical faults that pose serious safety risks. For persistent disposable vape issues replacement is always required since these units aren’t designed to be serviced. Do not attempt to use a device that continues auto-firing after following the previous steps, the risk of battery venting or fire outweighs any repair cost.
Preventing auto-firing requires consistent attention to device care and handling habits. Regular maintenance and mindful usage patterns significantly reduce the risk of malfunction, protecting both your safety and your device investment.
Establish a Weekly Maintenance Routine
Set a specific day each week to inspect and clean your device, even if it appears to be functioning normally. Check the activation button for stickiness by pressing it several times without the tank or pod attached, it should move freely and return crisply. Examine threading and connection points for e-liquid buildup, which creates conductive pathways that can trigger unintended firing. Wipe these areas with a cotton swab lightly dampened with isopropyl alcohol, then allow everything to dry completely before reassembling. This simple routine catches problems before they escalate into dangerous malfunctions.
Manage E-Liquid Carefully
E-liquid seepage causes the majority of auto-firing incidents. Always ensure pod or tank seals are intact before installation, replacing worn O-rings immediately. Fill tanks and pods to the manufacturer’s recommended maximum line, overfilling forces liquid into airflow channels and connection areas where it doesn’t belong. After refilling, wipe the exterior of your pod or tank with a clean cloth to remove any spilled liquid before inserting it into your device. Store spare bottles upright in a cool location, as heat expands liquid and can compromise container seals.
Practice Proper Storage and Handling
Keep your device away from loose change, keys, and other items that can press the activation button or introduce debris into connection ports. Transport it in a dedicated case or separate pocket compartment.
Choose Quality Components
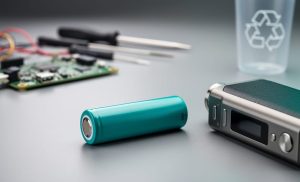
Invest in devices from reputable manufacturers that incorporate multiple safety features, including firing cutoff timers and short-circuit protection. Replace batteries according to manufacturer guidelines, typically every 300-500 charge cycles, rather than waiting for obvious signs of wear. If you use removable batteries, follow proper 18650 battery safety practices, including inspecting wraps for tears and using dedicated battery cases for transport.
Replace worn components promptly rather than continuing to use devices with damaged buttons, stripped threading, or loose connections. Prevention always costs less than dealing with a device failure.
Auto-firing transforms your vape from a controlled device into an uncontrolled heat source, creating several serious hazards that escalate the longer the firing continues. The primary danger is battery overheating, as the continuous power draw generates heat faster than the device can dissipate it. Lithium-ion batteries operating beyond their safe temperature range can enter thermal runaway, a self-reinforcing chain reaction where internal heat causes chemical breakdown that produces more heat. This process can lead to battery fires and explosions particularly in devices without adequate thermal protection.
The coil heating element also reaches dangerous temperatures during extended firing. Where normal hits last 3-5 seconds, auto-firing can continue indefinitely until the battery depletes or fails. These sustained temperatures can melt plastic components, ignite cotton wicking material, or cause second and third-degree burns if the device is in a pocket or held against skin. Property damage becomes a real concern when auto-firing devices ignite fabrics, papers, or other flammable materials in bags or on surfaces.
Quality devices incorporate multiple safety features specifically to prevent these scenarios. Timeout protection automatically cuts power after 8-10 seconds of continuous firing, even if the button remains pressed. Short-circuit protection detects electrical faults and shuts down firing, while over-temperature sensors monitor battery and coil heat. These protections, supported by vaping research on device safety, explain why regulated mods with safety chipsets are consistently safer than mechanical devices or poorly manufactured electronics. When a device auto-fires despite these protections, it signals that critical safety systems have failed and the device should be immediately retired.
This reference table summarizes the key differences between normal device behavior and true auto-firing problems, helping you quickly assess whether your device requires immediate attention.
| Observation | Normal Behavior | Auto-Firing Problem |
|---|---|---|
| Vapor Production | Stops immediately when button is released | Continues for several seconds after releasing button |
| Device Temperature | Slightly warm during use, cools quickly | Becomes increasingly hot, stays warm when idle |
| Button Feel | Clicks distinctly, returns fully to neutral position | Feels sticky, mushy, or stays partially depressed |
| Battery Drain | Gradual depletion matching usage patterns | Rapid unexpected drain even when not actively vaping |
Understanding these distinctions helps you respond appropriately to potential safety issues. If you observe auto-firing symptoms, follow the troubleshooting steps outlined in this article immediately. Keep in mind that device safety standards vary by location, and some regions have specific vaping laws governing product quality and manufacturer requirements.
No, you should not continue using a device that has auto-fired, even if it seems to work normally afterward. Auto-firing indicates a malfunction that could recur unpredictably and create a safety hazard.
Coverage varies by manufacturer and the cause of failure. Most warranties cover manufacturing defects but exclude damage from e-liquid contamination, drops, or improper maintenance. Contact your retailer with documentation of the issue promptly, as warranties typically require reporting defects within 30 to 90 days of purchase.
Pod systems and compact mods with side-mounted fire buttons tend to experience more auto-firing issues because their buttons are more exposed to e-liquid leaks and accidental pressure in pockets. Devices with recessed or touch-sensitive activation points generally have fewer button-related malfunctions.
Immediately. Power off the device, disconnect the battery or pod, and set it on a non-flammable surface to cool. Delaying action increases the risk of battery damage, burns, or thermal runaway.
Beyond these common questions, readers often wonder whether auto-firing damages batteries permanently. The answer depends on how long the malfunction lasted and how hot the battery became. Brief auto-firing episodes may not cause lasting harm, but prolonged activation can degrade battery chemistry, reduce capacity, and compromise safety features. If a battery was involved in an auto-firing incident lasting more than a few seconds or became noticeably hot, replace it rather than risk continued use.
Another concern involves whether professional repair is an option. For most consumer vape devices, especially pod systems and compact mods, professional repair is not practical or safe. These devices use sealed integrated circuits and proprietary components that cannot be serviced economically. If cleaning and basic troubleshooting do not resolve the issue, replacement is the appropriate solution. Only advanced regulated mods with replaceable components might justify professional assessment, and even then, the cost often approaches that of a new device.
Auto-firing after a hit isn’t just an annoyance, it’s a safety hazard that demands immediate action. If your device continues firing after you release the button, power it down and disconnect the battery or pod right away. Waiting to address the problem increases the risk of battery overheating, burns, and potential device failure.
The diagnostic process is straightforward: identify the symptoms, check for stuck buttons or contamination, clean thoroughly, and test safely. Most cases stem from e-liquid seepage or debris interfering with activation mechanisms. Regular maintenance prevents these issues before they become dangerous.
Don’t ignore warning signs or keep using a malfunctioning device because it seems to work “most of the time.” Auto-firing indicates a fundamental failure in your vape’s safety systems. If cleaning and inspection don’t resolve the problem completely, replace the device rather than gambling with a compromised one.
Prevention comes down to consistent care: keep connections clean, store your vape properly, address leaks promptly, and invest in quality devices with proven safety features. The few minutes spent on routine maintenance beats dealing with an emergency every time.